
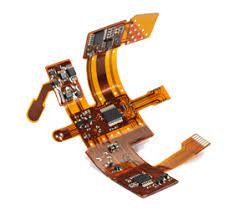
Repair a Damaged Flexible PCB Board
PCBs are the backbone of most electronic devices. They serve both as a physical support piece and as a wiring area. Unfortunately, they are very fragile and can easily become damaged. In this article, we’ll cover a few techniques for repairing a damaged flexible PCB board. Keep in mind that a good understanding of the schematics is crucial to successful PCB repair. Additionally, the ability to use a multimeter and an oscilloscope will be useful as well.
PCB repair involves soldering and resoldering, so it’s essential to take proper safety precautions when working with delicate electrical components. Ensure that the circuit is unplugged from any power source and that it’s properly cleaned before beginning the repair process. This will help to prevent damage to the underlying components and other potential issues.
The first step in repairing a flexible pcb board is to identify the problem. This can be done by visually inspecting the board or using a multimeter to test continuity and voltage. Depending on the type of problem, it may be necessary to remove the defective component and replace it with a new one.
How to Repair a Damaged Flexible PCB Board
Alternatively, the board may need to be rerouted or replaced completely. This can be achieved by removing the old PCB, re-routing it, and then soldering on new connections. The rerouted PCB will then need to be tested and verified before returning it to the customer.
A flexible PCB can also be repaired by restoring broken wires or traces. These can occur due to mechanical stress, such as repeated flexing or bending. Broken wires can lead to interrupted electrical connections, which can lead to device malfunction and failure. The traces can be restored by using conductive paint or adhesive copper tape, which can bridge the gap and restore the electrical connection.
If the traces are ripped or cut, they can be repaired by adding replacement Kapton(tm) material or by supporting and gluing the affected area. In addition, lifted pads can be put back in place and epoxied to restore the flex circuit to a functioning condition.
Rigid-flex PCBs are hybrid boards that combine the flexibility of a flex circuit with the rigidity of a PCB. These types of circuits are typically used in applications where space is limited or where a high level of flexibility is required. Like other types of PCBs, they can be damaged by various factors. To repair a rigid-flex PCB, you’ll need to identify the cause of the damage and choose the appropriate method of repair.
To fix a broken trace on a rigid-flex PCB, you’ll first need to clean the area surrounding it. This is important because a dirty surface can interfere with the repair process. To clean the trace, you can use a cotton swab dipped in rubbing alcohol. Once the trace is cleaned, you can apply a small amount of solder paste to the pad and use a soldering gun to heat it until it melts. Once the solder has cooled, you can solder on a new component.